Brand
用手机扫我
在手机上打开
| 是什么 ? | : | The Swiss Army Knife of Embedded Linux. It provides replacements for most of the utilities you usually find in GNU fileutils, shellutils, etc. The utilities in BusyBox generally have fewer options than their full-featured GNU cousins; however, the options that are included provide the expected functionality and behave very much like their GNU counterparts. BusyBox provides a fairly complete environment for any small or embedded system. |
| 开发语言 | : | C |
| 官方主页 | : | https://busybox.net |
| 源码仓库 | : | https://git.busybox.net/busybox |
注意:BusyBox默认是不支持macOS的, 但也有一些别人修改的在GitHub上。
| 操作系统 | 包管理器 | 安装命令 |
|---|---|---|
| Windows | scoop | scoop install busybox |
| Windows | Chocolatey | choco install -y busybox |
| apt | sudo apt-get install -y busybox | |
| dnf | sudo dnf install -y busybox | |
| openSUSE | zypper | sudo zypper install -y busybox |
| Alpine Linux | apk | sudo apk add busybox |
| pacman | sudo pacman -Syyu --noconfirm | |
| Gentoo Linux | Portage | sudo emerge busybox |
| FreeBSD | pkgng | sudo pkg install -y busybox |
step1、安装依赖
| 所有时 | Terminal + Shell + GNU CoreUtils |
| 下载时 | cURL |
| 解压时 | tar + bzip2 |
| 编译时 | gmake、gcc / GCC | Clang / LLVM |
| 运行时 | glibc ( libc.so、libpthread.sold-linux-x86-64.so ) |
step2、使用curl命令下载BusyBox源码包 ( )
)
curl -LO https://busybox.net/downloads/busybox-1.31.1.tar.bz2step3、使用tar解压BusyBox源码包
tar vxf busybox-1.31.1.tar.bz2step4、进入busybox-1.31.1目录,并查看它的内容

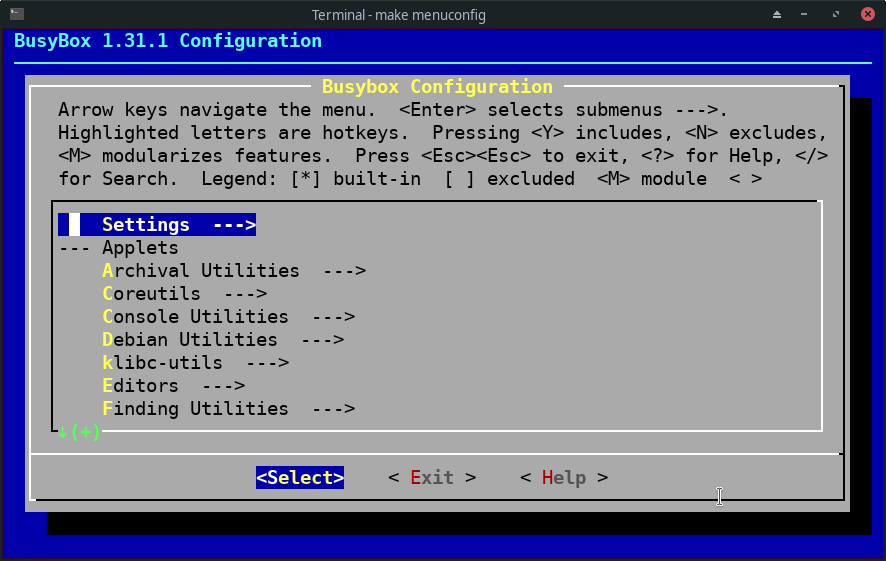
step5、配置编译参数
make menuconfig出现如下的配置界面:
step6、编译、安装
make && sudo make install下载Docker Official BusyBox Image镜像, 并创建一个容器,然后启动该容器:
docker run --tty --interactive --rm --hostname busybox busybox:glibstep1、创建一个文件夹作为rootfs的根
mkdir -p ~/buxybox-rootfs/binstep2、使用curl命令下载编译好的BusyBox二进制可执行文件 ()
curl -LO https://busybox.net/downloads/binaries/1.21.1/busybox-x86_64step3、修改busybox-x86_64文件的可执行权限
chmod a+x busybox-x86_64step4、安装busybox-x86_64
./busybox-x86_64 --install ~/buxybox-rootfs/binstep5、使用chroot切换根为~/buxybox-rootfs/bin
chroot ~/buxybox-rootfs/binstep1、查看Android设备的CPU平台
adb shell getprop | grep cpu运行效果如下:

Android支持的CPU平台如下:
| family | bit |
|---|---|
armeabi | 32-bit |
armeabi-v7a | 32-bit |
arm64-v8a | 64-bit |
mips | 32-bit |
mips64 | 64-bit |
x86 | 32-bit |
x86-64 | 64-bit |
step2、下载对应CPU平台的编译好的BusyBox二进制可执行文件 ()
curl -LO https://busybox.net/downloads/binaries/1.21.1/busybox-i686step3、把下载好的可执行文件推送到Android设备上
adb push busybox-i686 /data/local/busybox这里是推到Android设备的/data/local/目录下, 该目录在PATH环境变量里,并且该目录一般是具有可写权限的。
adb shellstep5、切换到/data/local目录
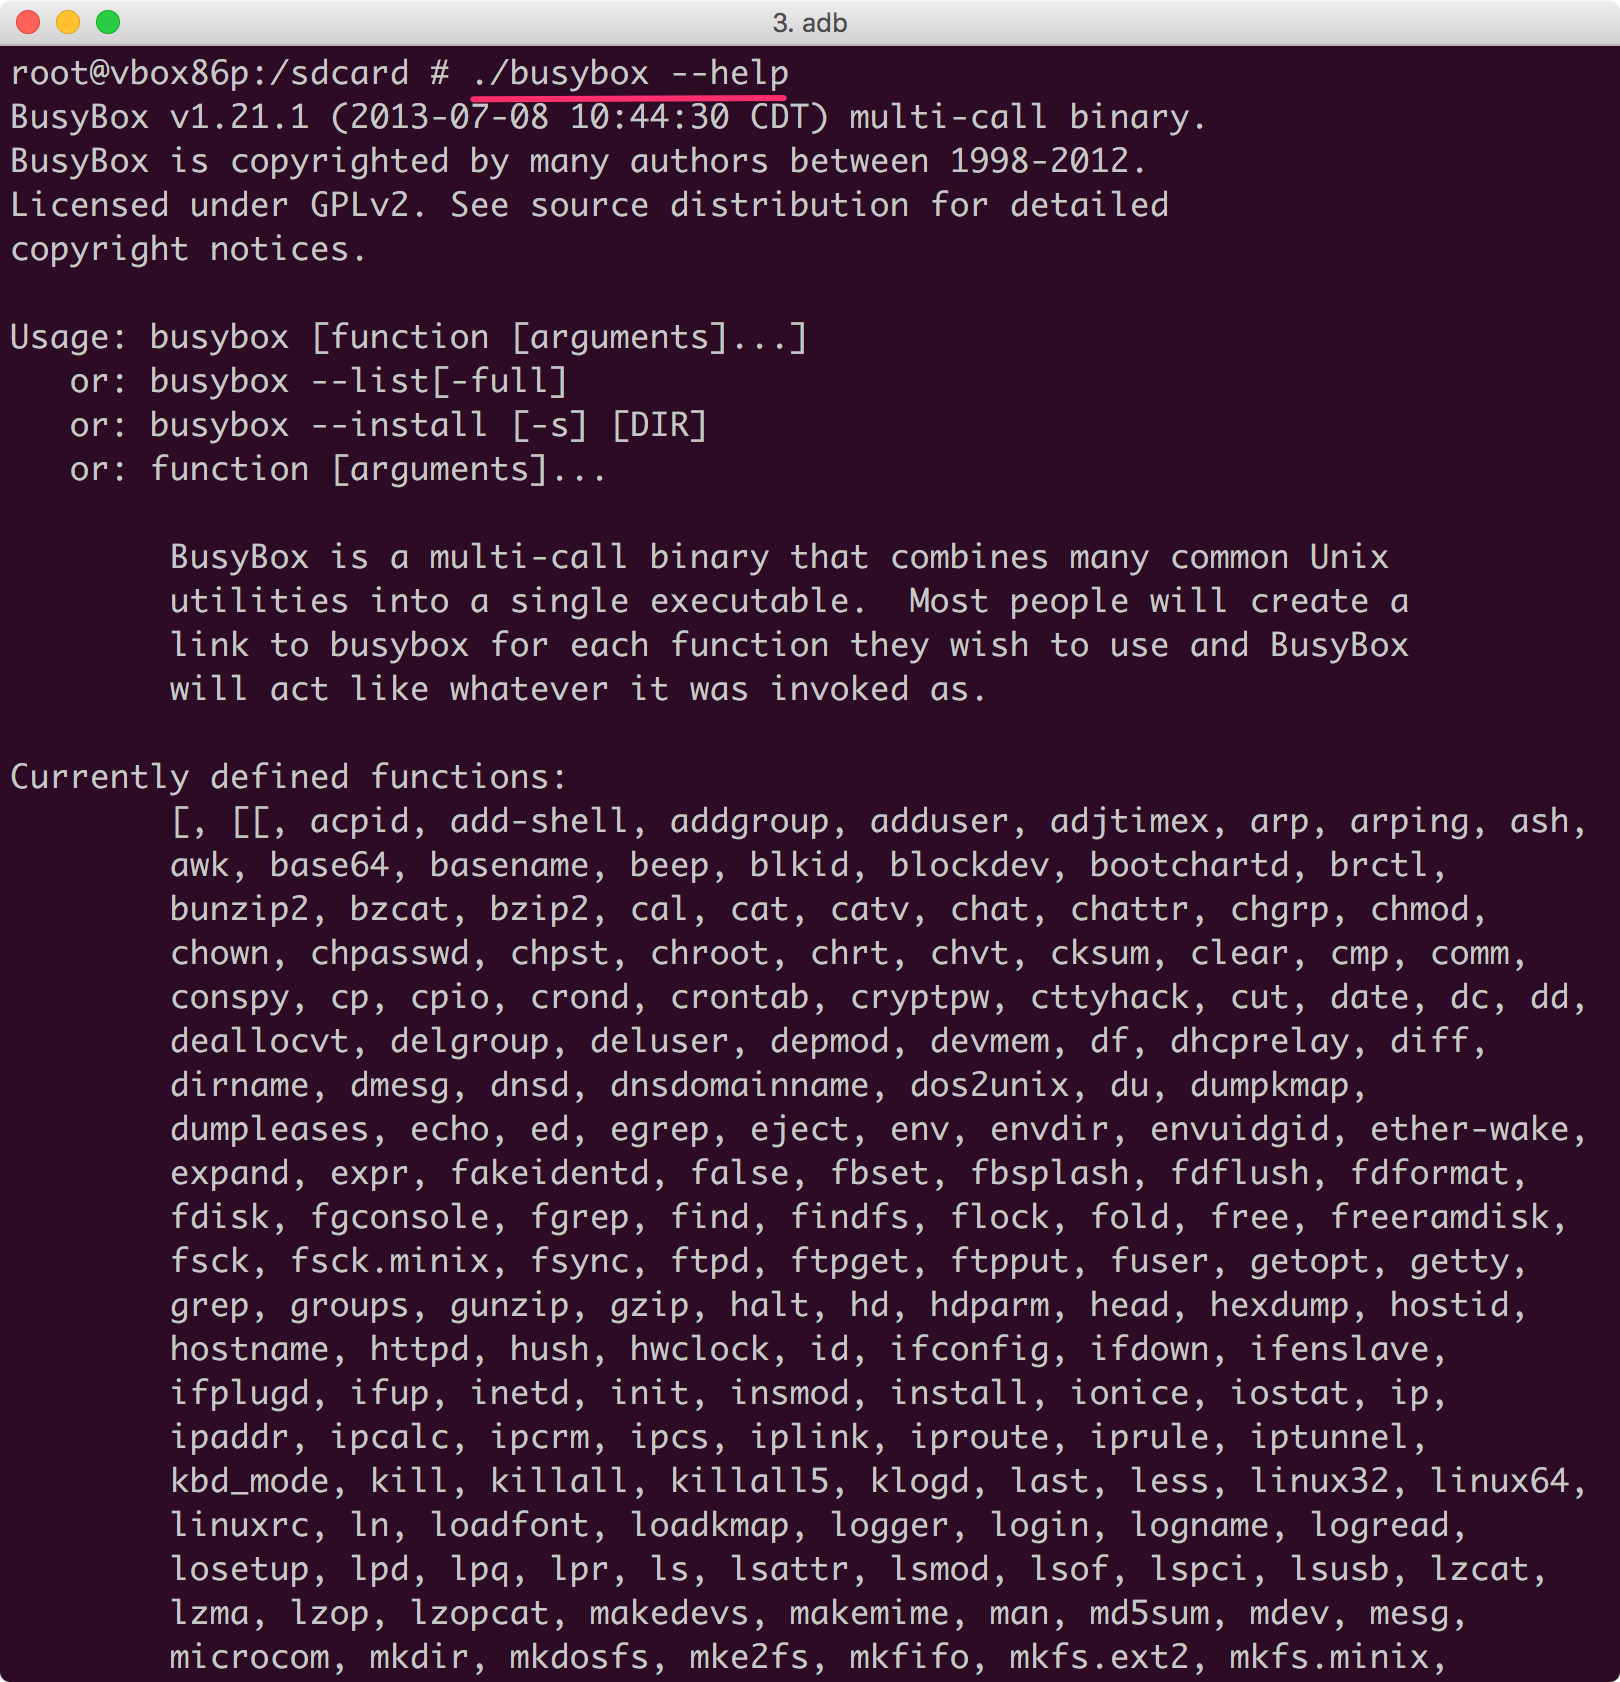
cd /data/localstep6、查看BusyBox的使用帮助
step7、安装BusyBox
./busybox --install .这样就可以使用busybox里面的这些命令了。
BusyBox里面的命令仍然是有限的。 我们可以通过Android NDK进行移植其他好用的命令行工具。